Jenkins docs suggest several ways to backup Jenkins home data. One of the easiest and mysterious ones is using file system snapshots. Luckily there’s a great tool – Kopia which I’ll demo today. We’ll backup Jenkins controller’s data to S3 bucket on the cloud.
If you later find this article useful take a look at the disclaimer for information on how to thank me.
Introduction
As you already know, Jenkins controller’s data contains important information like job definitions, secrets, etc… If we lose this data, we lose Jenkins. Therefore, we must back it up. Jenkins docs suggest 3 main methods for performing the backup:
- Jenkins plugin.
- filesystem snapshot.
- custom script.
Each one has its own benefits and drawbacks. File system snapshot seems like the less intrusive, fastest and most trustworthy. I’ll use the tool Kopia for that. I like it because backup and restore are quite obvious and implemented using several commands. We’ll see these in the demo. In addition, the backup is encrypted. This solves the issue of “Never include the controller key in your Jenkins backup!“. Moreover, Kopia provides ready to use docker images. So ideally, we can even run the backup as Kubernetes cron jobs.
Jenkins backup methods comparison
File system snapshots
There are probably many great definitions of file system snapshots on the web already. Yet, I’ll phrase my own just for the sake of this post. I view file system snapshots as capturing the state of a file system at a specific point in time (in our case, when we ran the backup process). So why use them? Firstly, file system snapshots are very fast because they are performed on the file system level. Next, they are incremental, so after the first “heavy” snapshot image is taken, all other snapshots are incremental, i.e. only modifications are copied. Similarly, the restore is fast as well. As you can see, file-system snapshots might be used for backup/restore of databases like MongoDB.
Backup script
You can, of course, code your backup and restore processes in a script. Using rsync will be great for that. During the first backup, it will copy the full copy of the data, but next copies will be incremental. However, the backup size will be larger than the size of the snapshot.
Jenkins backup plugin
Next, there’s also Jenkins plugin ThinBackup. It seems the most famous and supported. I tried its backup functionality and it’s very easy to use. Yet, the backups didn’t contain the full Jenkins home data. I didn’t check why and how the restore works. It seemed to me that the plugin doesn’t support the use case of Jenkins failure and its data loss. In that case you might want to restore the data to a different storage, raise a new Jenkins instance which will use the restored data and have it up and running instantly.
So why file system snapshot? We said it’s fast. Great. I mentioned the problems with the plugin. As for the script, it’s the easiest solution, yes. But what if we want to filter some data from the backup and compress backups? Also, how to tackle the issue of backing up the controller key which Jenkins uses for encryption of credentials.
After all, Jenkins backup docs are very explicit:
Never include the controller key in your Jenkins backup!
You may have an eureka. Let’s encrypt the backup. You are right, it will solve the above issue. But would you code all of the above features or use a tool which provides them for free?
Luckily, a great open-source tool exists – Kopia. It supports all of the features I mentioned and many more.
Why Kopia?
Kopia is a file-system snapshot tool which simplifies backup/restore procedures. As with all file-system snapshots it’s incremental, supports encryption and compression of snapshots. Moreover, it allows uploading your backups to many cloud storage providers, e.g. S3 storage. Of course, it has policies for filtering certain files and folders from the backup.
I found only one alternative tool with similar functionality – Restic. It has many more stars than Kopia on GitHub. Yet, CloudBees released a great video on backing up Jenkins using Kopia. So, we’ll use Kopia in the demo as well.
Backup Jenkins using File System Snapshots Demo
Demo overview
To demo backup and restore of Jenkins using file system snapshots we’ll follow below steps:
- install Jenkins helm chart on Kubernetes cluster.
- backup Jenkins using Kopia
- uninstall helm chart, remove its data to simulate loss of Jenkins.
- restore jenkins data from snapshot, reinstall Jenkins helm chart and instruct it to use volume of restored data.
Demo Prerequisites
I’ll use Linode’s managed Kubernetes cluster for the demo. Linode is a cloud service provider recently purchased by Akamai. With this purchase, Akamai became a competitor in the cloud providers market. You can repeat this demo on your own Linode account. Create one and get 100$ credit using this link.
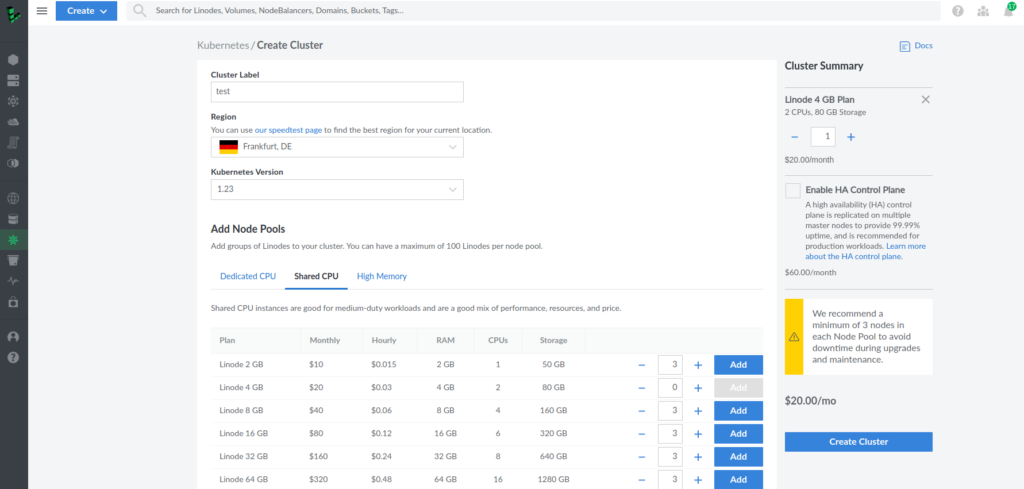
Create Kubernetes cluster on Linode
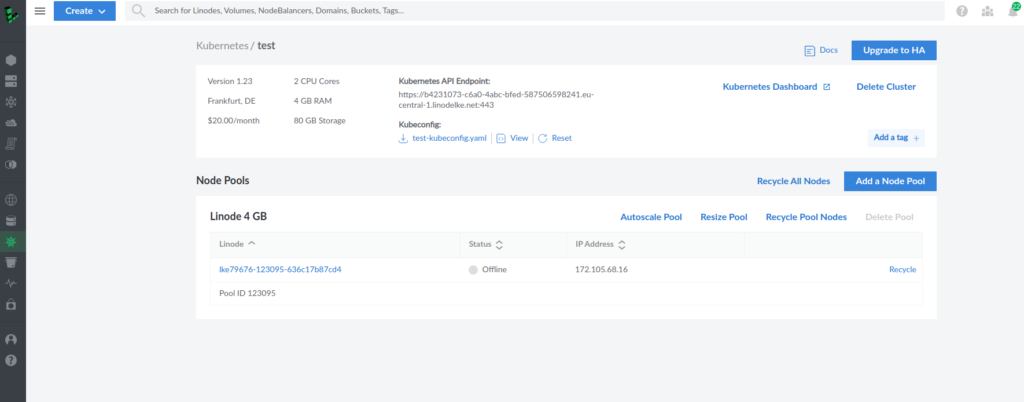
I created Kubernetes cluster on a shared node just for demo purposes. The process was very smooth and took several minutes.
Next, download its kubeconfig.
You can also create Kubernetes cluster on Linode using linode-cli.
In addition to Kubernetes cluster, you’ll need kubectl and helm installed on your local machine.
Create S3 bucket on Linode
For storing backups, we’ll create S3 bucket on Linode Object Storage.
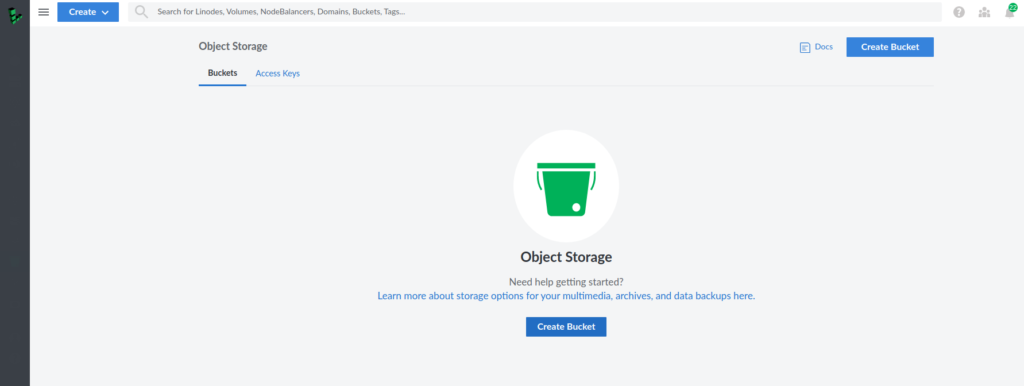
Next create bucket R/W access and secret keys. We’ll use them for connecting kopia to S3 bucket.
You’ll need to keep both keys at hand during backup and restore actions below. Note the warning that the secret key is displayed only once, after which it can’t be recovered.
Install Jenkins helm chart on Linode Kubernetes cluster
Let’s make sure we are connected to Linode K8S cluster.
kubectl config current-context
lke79676-ctx
We have already seen how install Jenkins helm chart using helm in the past. Now we’ll follow a bit of a different path. Clone repository from my github and cd into it. It contains all the relevant demo files.
We’ll first create hostPath persistent volume for storing Jenkins data.
kubectl apply -f jenkins/jenkins-volume.yamlWhile it’s better to use some network storage (e.g. NFS) for storing of Jenkins controller data, we’ll use hostPath volume for demo of backup and restore. Using hostPath might be a valid use case for running Jenkins on Kubernetes on-prem, especially for those who currently run Jenkins on bare-metal anyway and want to migrate to Kubernetes. In addition we’ll add 2 changes to Jenkins helm chart values.yaml:
- add controller init container which will modify the jenkins home storage owner/group and permissions:
  customInitContainers:
  - name: fix-jenkins-home-permissions
    image: "alpine"
    securityContext:
      runAsUser: 0
    volumeMounts:
    - name: jenkins-home
      mountPath: /var/jenkins_home
    command:
      - sh
      - -c
- (chmod 0775 /var/jenkins_home; chown -R 1000:1000 /var/jenkins_home)- As init container runs as root, we’ll need to modify user and group to root Jenkins controller pod will run as:
  runAsUser: 0
fsGroup: 0- In addition, let’s set Jenkins service to be
LoadBalancer
As we are in the cloud, thanks to Linode jenkins service will get ip accessible on the internet.
Now let’s install Jenkins using helm
helm repo add jenkinsci https://charts.jenkins.io
helm repo update
helm install jenkins -n jenkins --create-namespace jenkinsci/jenkins -f jenkins/values.yaml
Wait till all Jenkins resources are running, healthy and ready.
Next, access http://[loadBalancerIP:8080] in the browser to make sure our Jenkins is available. Nice. Let’s create some test job in Jenkins UI so that there will be data to back up. For that purpose login using as admin. Grab the password using below command:
kubectl exec --namespace jenkins -it svc/jenkins -c jenkins -- /bin/cat /run/secrets/additional/chart-admin-passwordWhere is Jenkins Data ?
Before backing up Jenkins home, let’s see where its data resides.
Describe jenkins pod and search for jenkins-home persistent volume.
kubectl describe pod jenkins-0 -n jenkins
We see that the volume has type PersistentVolumeClaim and its name is jenkins. Let’s find the the persistent volume the claim is bound to:
kubectl get  pvc jenkins -n jenkins
NAME      STATUS   VOLUME       CAPACITY   ACCESS MODES   STORAGECLASS   AGE
jenkins   Bound    jenkins-pv   20Gi       RWO                           25m
Now to see the actual local Kubernetes node path where Jenkins data resides, we’ll describe the volume:
kubectl describe pv jenkins
...
Source:
    Type:          HostPath (bare host directory volume)
    Path:          /data/jenkins-volume/
    HostPathType:
We see that the data is at /data/jenkins-volume/. That’s not surprising because that’s the path we put in the manifest of the volume.
Backup Jenkins using Kopia
Let’s now run kopia pod and mount jenkins home data to it. I’ve set the entrypoint to sleep 6000. It should be enough for the demo.
kubectl apply -f kopia/pod.yaml We’ll now run shell in kopia container:
kubectl exec -it pod/kopia bashNext let’s run below CLI commands in order to create a file system snapshot of jenkins home data and upload it to S3 bucket.
Note that S3_ENDPOINT_URL looks like eu-central-1.linodeobjects.com. KOPIA_PASSWORD is the password for encryption of repository contents.
Take all other S3 storage related variables from S3 storage provider (e.g. Linode).
# create s3 repository which will hold snapshots
kopia repository create s3 --bucket=${S3_BUCKET_NAME} --access-key=${S3_BUCKET_RW_ACCESS_KEY} --secret-access-key=${S3_BUCKET_ACCESS_KEY_SECRET} --endpoint=${S3_ENDPOINT_URL} --password=${KOPIA_PASSWORD}
# validate repository compatibility
kopia repository validate-provider
# connect to the repository
kopia repository connect s3 --bucket=${S3_BUCKET_NAME} --access-key=${S3_BUCKET_RW_ACCESS_KEY} --secret-access-key=${S3_BUCKET_ACCESS_KEY_SECRET} --endpoint=${S3_ENDPOINT_URL} --password=${KOPIA_PASSWORD}
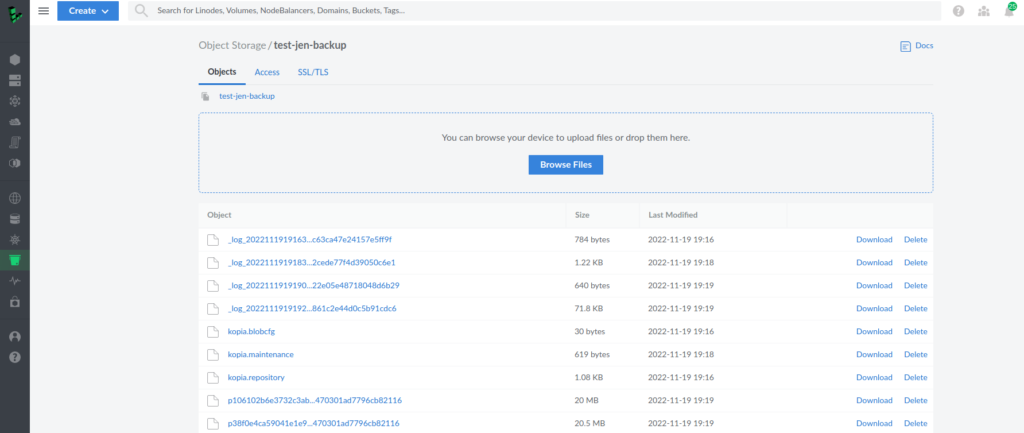
# create snapshot
kopia snapshot create /var/jenkins_homeYou may see an encrypted Jenkins home data in S3 storage:
Let’s now uninstall Jenkins helm chart and delete its data to simulate loss of Jenkins.
helm uninstall jenkins -n jenkins
kubectl delete pv jenkins-pv
In addition we’ll delete mounted Jenkins home data from kopia container because it might be still there on the disk while there are pods using it.
# inside kopia pod's container
rm -rf /var/jenkins_home
and delete kopia container for the sake of the experiment’s honesty :).
Restore Jenkins Backup using Kopia
Now lets reinstall Jenkins from scratch and enter its UI. As you can see there, the test job we created is missing because it’s a fresh installation.
Let’s now, restore Jenkins data by running kopia pod and shell in its container:
# connect
kopia repository connect s3 --bucket=${S3_BUCKET_NAME} --access-key=${S3_BUCKET_RW_ACCESS_KEY}
   --secret-access-key=${S3_BUCKET_ACCESS_KEY_SECRET} --endpoint=${S3_ENDPOINT_URL} --password=${KOPIA_PASSWORD}
# list snapshots
kopia snapshot list
Enter password to open repository:

root@kopia:/var/jenkins_home
  2022-11-19 19:19:26 UTC k15a7b1fc240e5ccc596c4a3dcf15267d 204.8 MB drwxrwxr-x files:1394 dirs:472 (latest-1,hourly-1,daily-1,weekly-1,monthly-1,annual-1)
Let’s now restore the snapshot to /var/jenkins_home:
# we use the id from snapshot list
kopia restore k15a7b1fc240e5ccc596c4a3dcf15267d /var/jenkins_home/
As Jenkins shares the same persistent volume jenkins-pv, with kopia, the restored data should reach Jenkins container as well.
If you refresh Jenkins UI, you won’t see test Job we created we “losing” Jenkins data. Oh no! Haven’t the restore worked?
To resolve this, we’ll use our last trick. Go to Manage Jenkins and click Reload Configuration From Disk. Refresh Jenkins UI and drum roll, you’ll see the restored job 🙂
Of course, to develop this demo to something production ready you’ll have to backup Jenknis in quiet mode, automate backups validations, run backup as Kubernetes Cron Job, keep its configuration in Kubernetes secrets and ConfigMaps and have automation for restore.
Summary
That’s it about backup Jenkins using file system snapshots. As always, feel free to share. If you found this article useful, take a look at the disclaimer for information on how to thank me.
- Become a Certified Kubernetes Administrator (CKA)!
- Become a Certified Kubernetes Application Developer (CKAD)!
- BUNDLE KUBERNETES FUNDAMENTALS & CKA CERTIFICATION (COURSE & CERTIFICATION) FOR THE BEST DEAL! $499 ONLY!
Recommended Kubernetes courses on Pluralsight:
Sign up using this link to get exclusive discounts like 50% off your first month or 15% off an annual subscription)
Recommended Kubernetes books on Amazon: